Is there anything more frustrating than a fan that’s lost its mojo on a sweltering day? You crank it up to the highest setting, but instead of a refreshing gust of wind, you get a lazy, pathetic wobble. It’s the kind of weak breeze that just seems to mock the heat. I remember one blistering summer afternoon when my trusty pedestal fan decided to take a slow-motion vacation. The air in my living room felt thick enough to swim through. Before you give up and start shopping for a new cooling solution, I’ve got good news. Learning How To Fix A Slow Spinning Fan is often easier than you think, and you can usually do it yourself with a few simple tools. Let’s roll up our sleeves and get that air moving again!
Why Is My Fan Spinning So Slowly Anyway?
Before we dive into the fix, it helps to understand what’s causing the slowdown. A fan is a relatively simple machine, and when it starts to lag, it’s usually due to one of a few common culprits. Think of it like a bicycle—if the chain is rusty or the wheels are clogged with mud, you have to pedal a lot harder to get anywhere. Your fan is no different.
Here are the most likely reasons for its sluggish performance:
- Dust and Grime Buildup: This is the number one offender. Over time, dust, pet hair, and other airborne gunk get pulled into the fan’s motor housing, creating friction and literally gumming up the works. The motor has to fight against this resistance, causing the blades to spin slowly.
- Lack of Lubrication: The motor’s shaft spins inside bearings. These bearings need to be lubricated to reduce friction. After years of use, the original lubricant can dry up, causing the metal parts to grind against each other.
- A Failing Capacitor: This sounds more technical, but it’s a common issue, especially in older fans. The capacitor is like a small battery that gives the motor an initial “kick” to get it spinning at the right speed. When it starts to fail, the motor doesn’t get enough power to reach its full potential.
Safety First: The Golden Rule of Fan Repair
Before you touch a single screw, let’s get the most important step out of the way. Unplug the fan from the wall outlet. I can’t stress this enough. This isn’t a suggestion; it’s a mandatory rule. Working on an electrical appliance that’s still connected to a power source is incredibly dangerous. So, please, triple-check that it’s unplugged before you proceed.
The Step-by-Step Guide to Fixing Your Slow Fan
Ready to bring that breeze back to life? We’ll start with the easiest and most common fixes first. You’ll likely only need a screwdriver, some cleaning cloths, a soft brush (an old toothbrush works great), and some appropriate lubricating oil.
Step 1: A Thorough Deep Clean
Nine times out of ten, a good cleaning is all your fan needs. You’d be shocked at how much gunk can accumulate inside.
- Disassemble the Fan Cage: Most fans have clips or small screws holding the front and back grilles (the cage) together. Carefully undo these and remove the front grille. Some models might have a single screw at the bottom.
- Remove the Fan Blades: There’s usually a cap in the center of the blades that unscrews. Important: Most fan blade caps are reverse-threaded, meaning you turn them clockwise to loosen and counter-clockwise to tighten. Once the cap is off, the blade assembly should slide right off the motor shaft.
- Clean the Grilles and Blades: Take the grilles and blades to a sink or bathtub and wash them thoroughly with soap and water. Let them dry completely.
- Clean the Motor Housing: This is the critical part. Use a vacuum cleaner with a brush attachment to suck up all the loose dust from the motor vents on the front and back. Then, use a dry cloth or a slightly damp one to wipe down the exterior of the motor casing. Use an old toothbrush or a can of compressed air to get dust out of the hard-to-reach vents. The goal is to clear the airways so the motor can stay cool and free of debris.
Step 2: Lubricate the Motor Bearings
If cleaning alone doesn’t do the trick, it’s time to address friction. A dry motor shaft will struggle to spin freely.
“A common mistake people make is using WD-40 to lubricate a fan motor,” notes David Chen, an appliance repair specialist with over 20 years of experience. “While WD-40 is a great cleaner and water displacer, it’s not a true long-term lubricant. It can actually attract more dust over time. You need an electric motor oil or a 3-in-1 multi-purpose oil.”
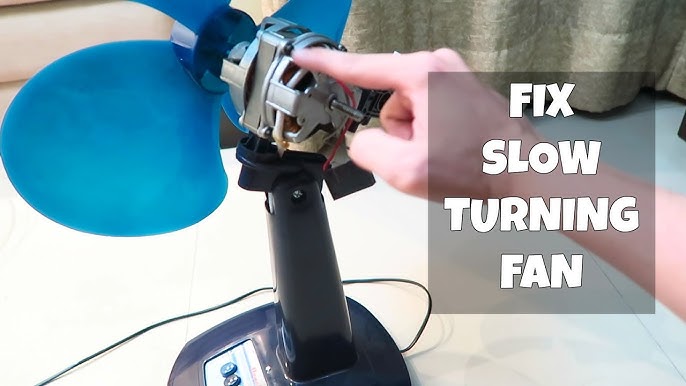
- Locate the Bearings: With the blades off, you’ll see the metal motor shaft sticking out. The bearing is right where the shaft enters the motor housing. There’s usually another bearing on the back of the motor as well.
- Apply the Lubricant: Put just a few drops of electric motor oil or 3-in-1 oil directly onto the shaft right where it meets the housing.
- Work it In: Manually spin the shaft with your fingers for about a minute. This helps the oil work its way down into the bearings. You should feel the shaft start to spin more freely.
- Reassemble and Test: Put the fan back together in the reverse order you took it apart. Remember the reverse-threaded cap for the blades! Plug it in and test it. You should notice a significant improvement in air circulation.
Step 3 (Advanced): Checking the Capacitor
If you’ve cleaned and lubricated your fan and it’s still slow, the problem might be the capacitor. This step is a bit more involved and requires some confidence with basic electronics. If you’re not comfortable, this is the point where calling a professional is a wise choice.
- Locate the Capacitor: The capacitor is usually a small, black, box-shaped component located near the motor or switch housing. It will have two wires coming out of it and markings indicating its capacitance, usually in microfarads (µF).
- Inspect for Damage: Look for any signs of bulging, leaking, or burn marks on the capacitor. If you see any, it almost certainly needs to be replaced.
- Replace the Capacitor:
- Take a clear photo of how the wires are connected before you do anything.
- Purchase a new capacitor with the exact same specifications (µF rating and voltage). You can find these online or at an electronics supply store.
- Carefully snip the wires of the old capacitor and use wire connectors or a soldering iron to attach the new one in the same configuration.
After reassembling, this should solve the problem for fans with weak motors. A new capacitor can often make an old fan feel brand new, improving its energy efficiency and power.
How to Keep Your Fan Running Smoothly
The best fix is prevention. To avoid having to look up how to fix a slow spinning fan again next year, follow this simple maintenance checklist.
- Dust Regularly: Every few weeks, use a duster or a vacuum brush to clean the fan grilles while it’s assembled. This prevents major buildup.
- Deep Clean Seasonally: At the beginning and end of the hot season, perform the full deep clean outlined in Step 1.
- Lubricate Annually: A few drops of oil once a year is usually enough to keep the bearings in top shape.
Frequently Asked Questions (FAQ)
Q1: Can a slow-spinning fan be a fire hazard?
Yes, it can be. When a motor struggles to turn due to dust and friction, it can overheat. This excessive heat can potentially damage the motor’s wiring and, in extreme cases, become a fire risk. Regular cleaning is a critical safety measure.
Q2: How do I know if the fan capacitor is bad?
The most common symptoms of a bad capacitor are a slow-spinning fan, a fan that needs a manual “push” to get started, or a motor that hums but won’t spin at all. Visual signs like bulging or leaking are also dead giveaways.
Q3: Why is my ceiling fan spinning slowly?
The principles are the same! Ceiling fans also suffer from dust buildup on the blades (which adds weight and drag) and in the motor housing. They also have capacitors that can fail. The cleaning and replacement process is similar, just on a larger scale.
Q4: Can I use cooking oil or WD-40 to lubricate my fan?
No. Cooking oils will become gummy and rancid, making the problem worse. As mentioned, WD-40 is not a suitable long-term lubricant and can attract more dust. Stick to oils specifically designed for electric motors, like 3-in-1 oil or sewing machine oil.
Q5: When should I just give up and buy a new fan?
If you’ve thoroughly cleaned and lubricated the fan, and even tried replacing the capacitor, but it still runs slow or makes grinding or rattling noises, the motor itself is likely worn out. At that point, the cost and effort of replacing the motor usually outweigh the price of a new fan. If you smell a burning electrical odor, stop using the fan immediately and replace it.
There you have it! By following these steps, you can breathe new life into your sluggish fan and restore that cool, refreshing breeze to your home. Taking an hour to perform this maintenance not only saves you money but also gives you the satisfaction of a successful DIY repair. Now you know exactly how to fix a slow spinning fan, so you can stay cool and comfortable all summer long.